DNS - Windows Server AD
Note: If you need to zoom in, you can click on the image.
Install DNS Role
First, We will bring up Server Manager. Go to Manage -> Add Roles and Features -> Role-based or feature-based installation. Then we will go with the default setting and under the server roles section, we will click on DNS server and click “Add features” and then click next.
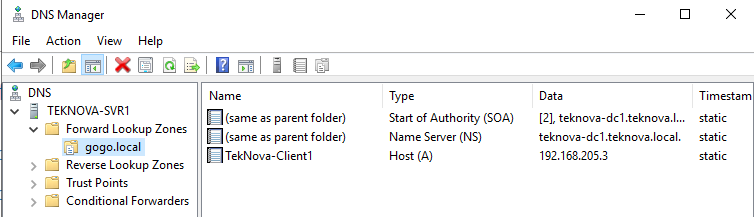
Under features, we will click Next and close when it is done. You should have the DNS manager. If you can’t find it, it is in the Tools section.
Background Knowledge on DNS Zones
DNS Zones contains all the IP address records. You can think of it as a filing cabinet of papers with IP address.
Types of DNS zones
- Forward lookup Zones: Domain Name to IP address.
- Reverse Lookup Zone: IP address to Domain Name.
- Primary Zones: contain all relevant resource records and handle DNS queries for a domain.
- Secondary Zones: Read-only copies of primary zones.
- Stub Zone: Contains only record for DNS server
- Active Directory Integrated zone: Reside only on DC, Full Replication, Allows Secure Dynamic Update.
Create a Primary Zone
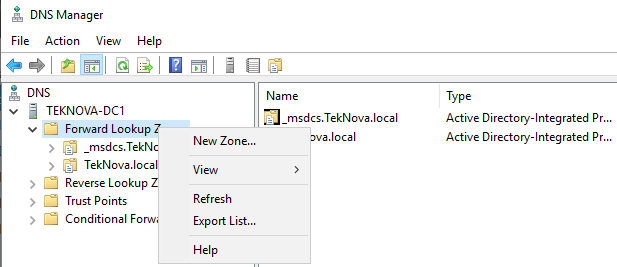
Bring up the DNS Manager. Right-click on “New Zone”

Then it ask you where you want to create your zone file. I am going keep like it is.
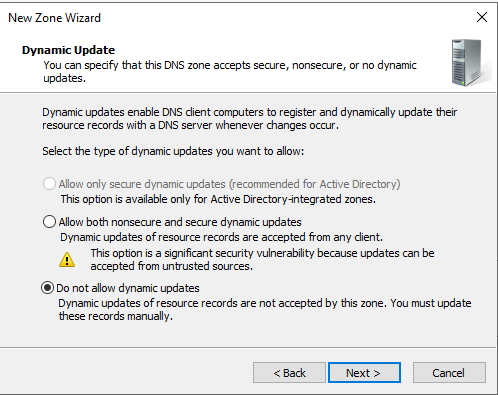
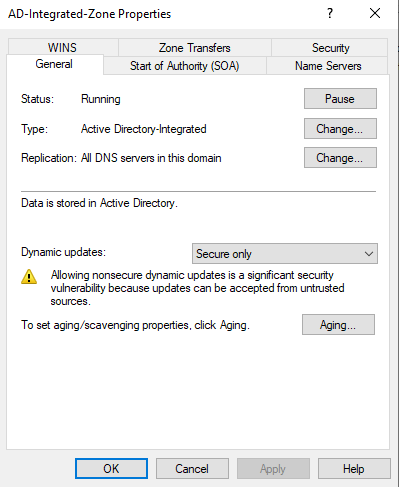
Then it ask if you want to allow Dynamic Update. Essentially, if the IP address of the computer get changed, then that record automatically get change to the new IP. If you don't enable dynamic update then you would have to manually change the record
Creating a Secondary Zone
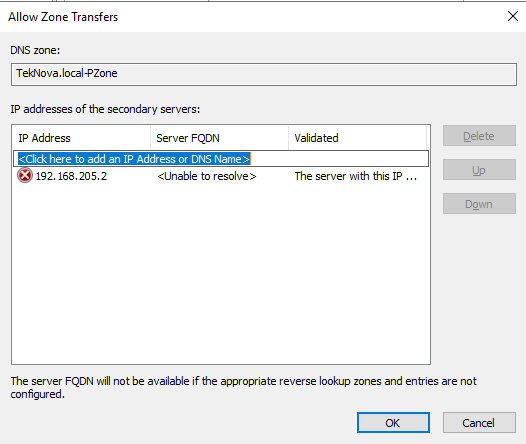
First thing we need to do is right click on the zone we want our secondary zone to have and click “Properties”. Then I’m going to click: “Zone Transfers”. Now, I’m going to select IP address and click edit. Now I am going to enter the IP address of my secondary DNS server. Then click OK and apply.
Now, let's enter a name for our secondary zone. I will use the same name of my primary zone.
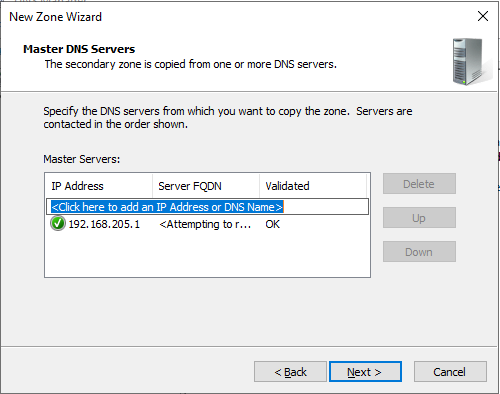
After it will ask you to enter the master DNS servers. I will enter the IP address of my primary DNS server and click next and finish
Creating the Stub Zone
This would use the same process. Additional things to note, the zone would only contain DNS server.
Create an Active Directory Integrated Zone
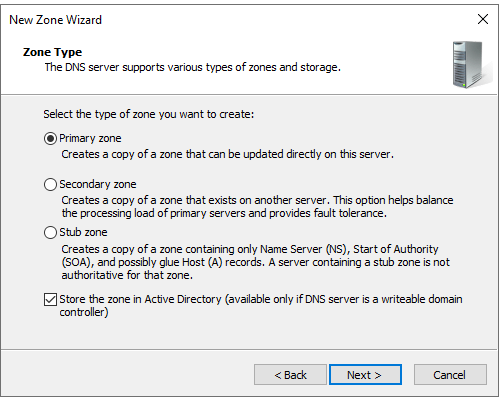
We will start by opening a DNS Manager. Right click “Forward Lookup Zones” -> New Zone. Then the New Zone Wizard will pop up. Under zone type, make sure the option: “Store the zone in Active Directory” is checked.

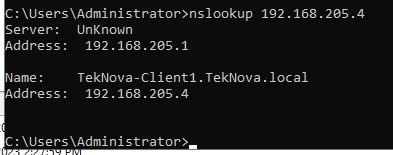
Creating a Reverse Lookup Zones
Reverse Lookup Zone will take a IP address and turn it into a Domain Name. We will start by right clicking on “Reverse Lookup Zone” and click “New Zone”. Just like our Forward Lookup Zone, we would get the same option for Reverse. For now, I will create a Active Directory Integrated Zone.
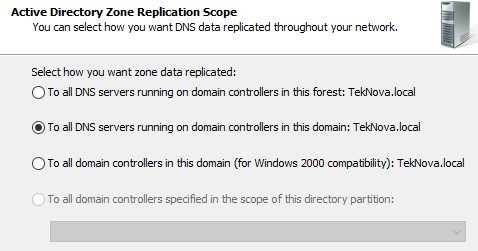
Now, it asking how we want zone data replicated. I will keep the default values.
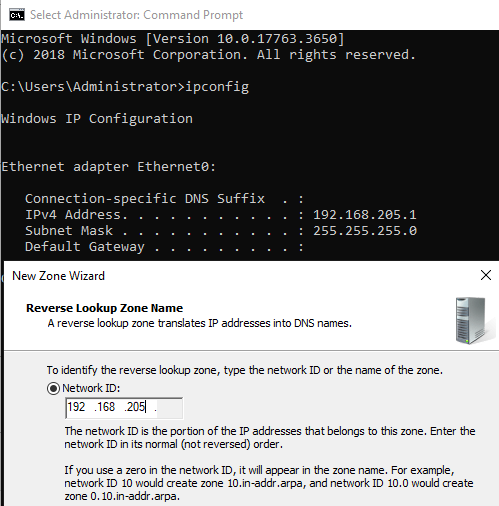
Then the wizard ask if you want create an IPv4 Reverse Lookup Zone or IPv6 Reverse Lookup Zone. I will select IPv4 Reverse Lookup Zone.
Then it will ask you to enter the Network ID. Basically the area where you want the search to be. I will enter 192.168.205

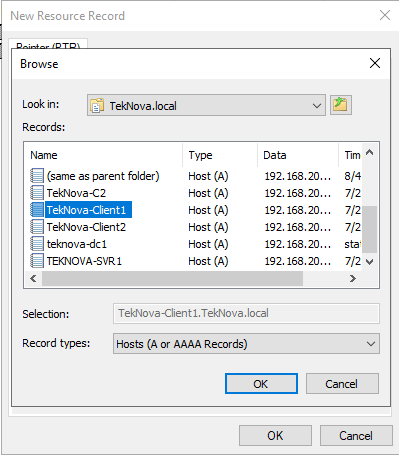
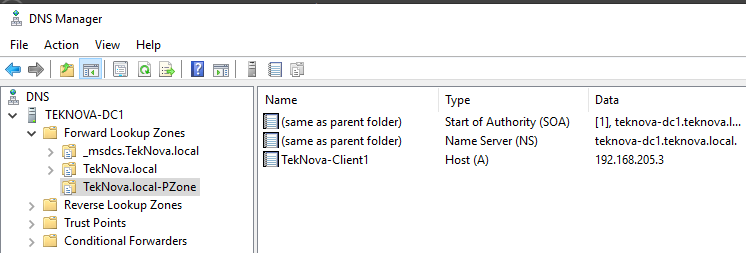
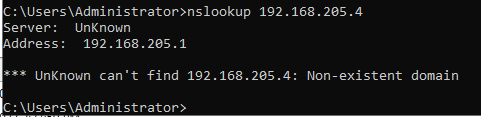
Before PTR record was created:
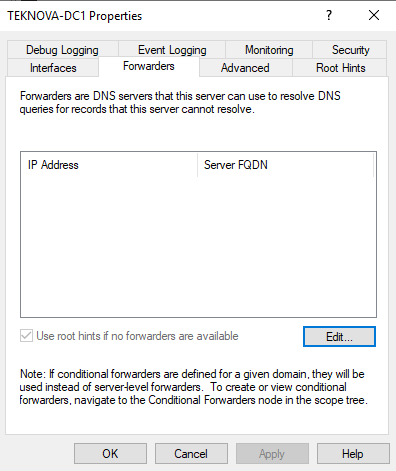
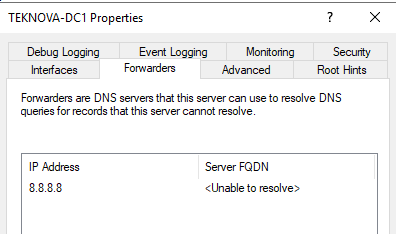
Create a Forwarder
We will start by going to the DNS Manager. Then we click on our domain controller. Then we should see Forwarder. Now click on it and click Edit.
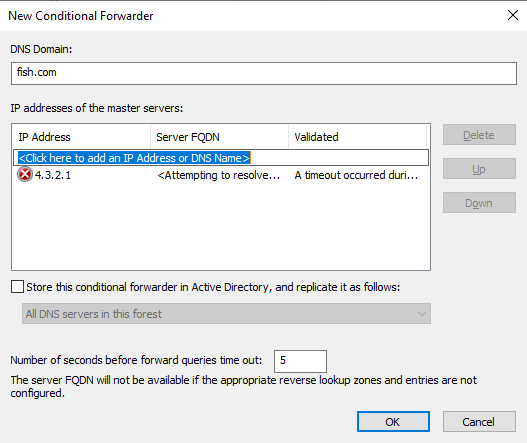
Creating a Conditional Forwarder
To setup a conditional forwarder, we will right click on “Conditional Forwarders” and click on “New Conditional Forwarder”. Under this menu, we would specify the DNS domain and the IP address of the DNS server. For example, Let say I want any requests that are going to fish.com to go to 4.3.2.1, I would specify the DNS domain as Fish.com and IP address: 4.3.2.1