Windows Server Core Installation
Note: If you need to zoom in, you can click on the image.
Pros and Cons of Server Core
Advantages:
- Take up less disk space, and uses very little server resources.
- Has fewer components = Fewer software updates = Reduces num of monthly restarts
- Small attack surface = Being less vulnerable to exploit.
- Some application are not supported on a Server Core Installation
- Some roles and role services are not available.
- No GUI - However, we can bypass this problem by managing it remotely.
Installation process
Let’s first create a new Virtual Machine for our Server Core Windows. This is essentially the same installation process. You can use this as reference: https://securitynguyen.com/posts/windows-server-2019/create-a-empty-shell-windows-server-using-hyperv/. You can ignore the virtual switch since that step has already been done. The only step that need to be focused is “Virtual Machine”.
My Hyper-V Virtual Machine Spec:
- Name: SN-CORE
- Generation: Generation 2
- Startup Memory: 4096 MB
- Connection: vSwitch1
- Configure Virtual Hard Disk: Use default setting
- Installation Option: Select Windows Server 2019 Image
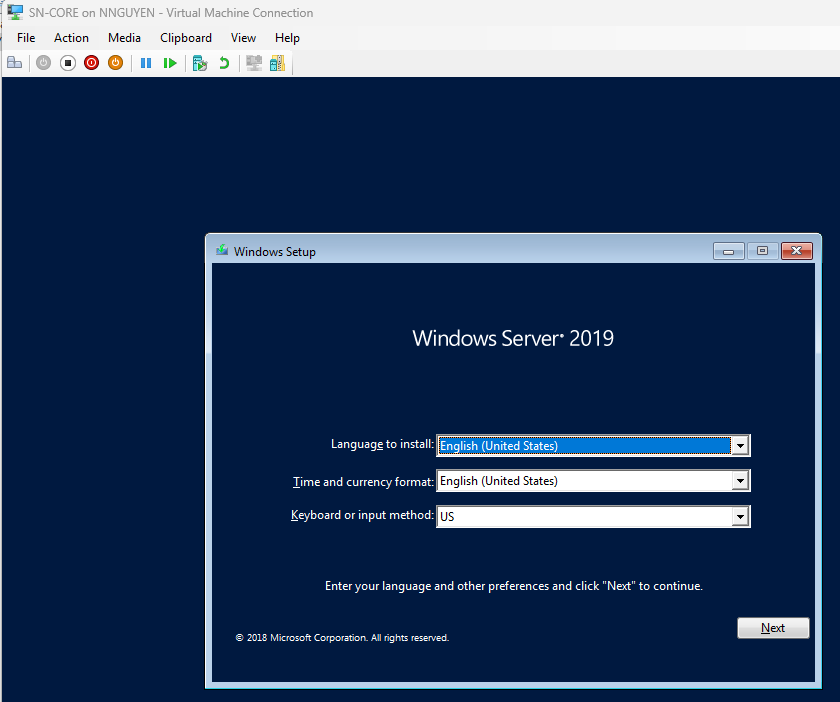
You can refer to this blog post that I made when installing Windows Server 2019 since it literally the same step but instead of clicking on Datacenter Evaluation (Desktop Experience), we will be installation Datacenter Evaluation.
Link to the blog post:
https://securitynguyen.com/posts/windows-server-2019/booting-up-windows-server-2019/
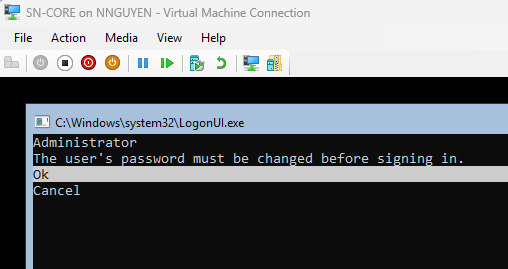
After installation, it will tell us to change the Administrator Password before signing in.

Post Installation
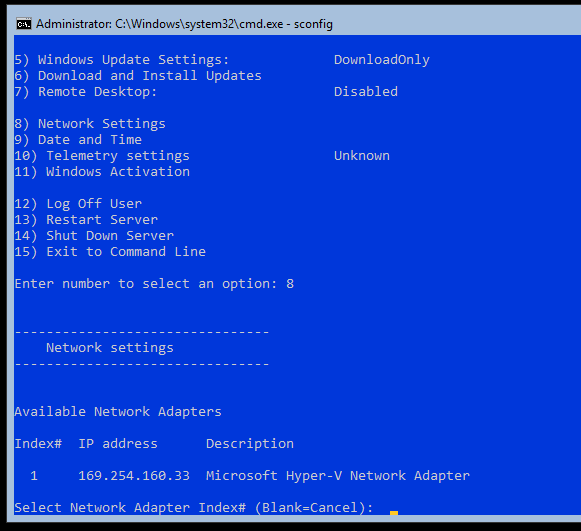
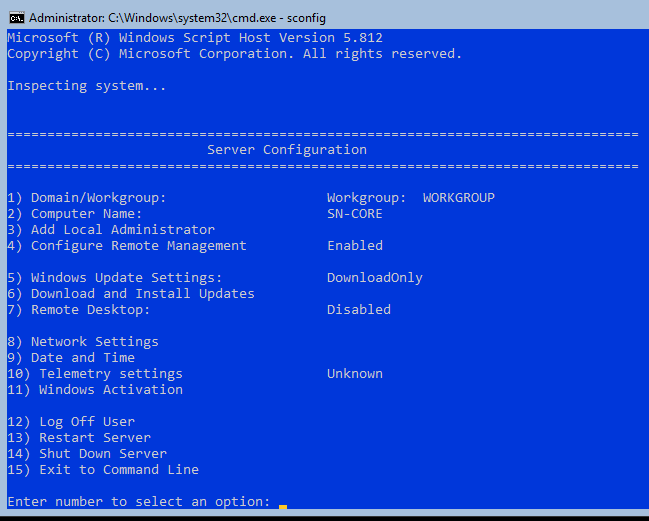
We will be using sconfig to help us configure our Server Core.
What is sconfig?
Menu based utility that is built into Windows that allows you to easily configure Server Core. Additionally, it eliminates the need to know “scripting” to configure the settings. Hate coding? No problem sconfig solves your problem.
DNS & IP Configuration
Let start by typing sconfig in the command line. Since we are working with IP, that would be under network setting. So, we are going to enter 8 and then click the network adapter that you’re using. I only have one so that a obvious choice for me.
Then it will lay out some Network Adapter Setting:
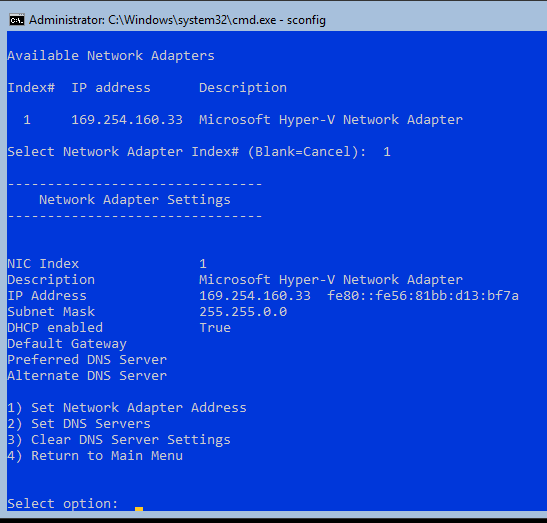
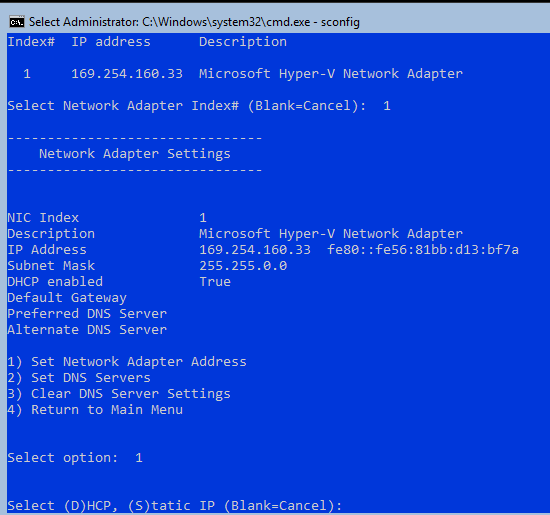
As seen from the picture above, we are going to enter 2 to set the DNS server. Then it ask us to enter the preferred DNS server. In this overall lab, the windows server (SN-DC1) will be the DNS server so I'm going enter the IP of SN-DC1 (192.168.1.250). Then it ask if there is alternate DNS server you want use. You can enter 8.8.8.8 (Google DNS Server) or just leave it empty. It's up to you.

We just completed configuring our network setting. Let’s return to the Main Menu (4) and change the hostname.
Rename the Hostname
Let enter 2 (Computer Name) to change the hostname. My machine new name going to be SN-CORE. You can name whatever you see fit. After entering the new name, we have to restart the computer. After restarting, you should see the name of the host changed.
That is it for now. Thanks for reading :)