Post installation - Windows Server 2019
Note: If you need to zoom in, you can click on the image.
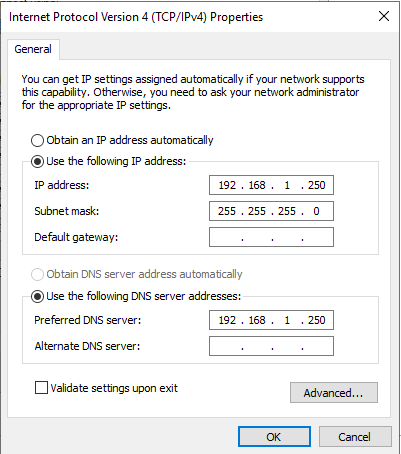
Last time, we finish installing Windows Server on our virtual machine. In this post, we will set a static IP on the Windows Server. To do that, we will click on Local Server and then click on “Ethernet” and then properties. Afterward, we will click on Internet Protocol v4 (TCP/IPv4). Then we will click on “Use the following Address” and then we’re allowed to enter the following information: IP address, Subnet Mask, Default Gateway.
For my setup I will put the IP address: 192.168.1.250 and the Subnet Mask to be 255.255.255.0 and set the DNS to “Use the following DNS server address” and enter: 192.168.1.250 since our windows server is going to take care DNS. Click OK twice.
Rename Windows Host
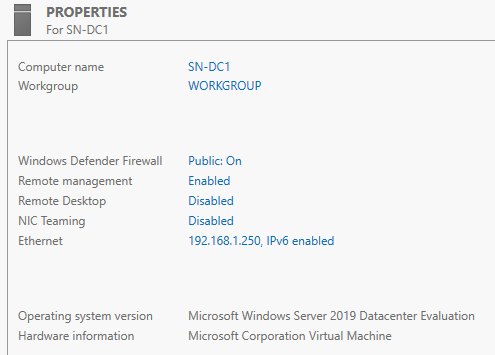
To rename the windows host name, we can click next to “Computer Name” . Click “Change” and you should see a GUI that ask you for Computer Name. The computer Name is the name of the host. Then after clicking “Apply”, we will click Close and the restart progress begins.
Change the Type of Virtual Switch
We have to go to: “Virtual Switch Manager”. Then click on vSwitch1, You will have the following option: External network, Internal network, Private network.
Private network is when your virtual machine cannot connect to the internet, it cannot connect directly to the host machine. The only thing that it will be able to connect to will be additional virtual machine that we create on this host. (Complete isolation)
External network is when your virtual machine is connected to the internet.
We are going to choose “Private network” and click Apply. Now our static IP is now set. Let’s reset the virtual machine and hopefully the IP address is set.
Disable IPv6
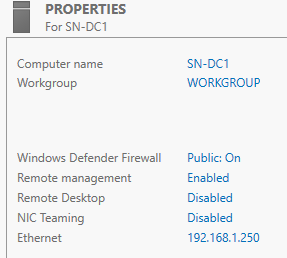
Since we are not using IPv6. Let’s turn it off. First step to to click on the IP address next to Ethernet. Right click Ethernet and click Properties and then uncheck Internet Protocol Version 6 (TCP/IPv6) and click OK.
Licensing
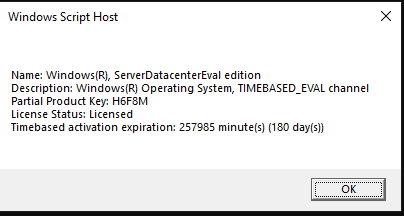
Windows have a Software Licensing Manager tool that is available. To access it, press CMD+R and type slgmr.vbs. It will show you the types of command you can do and what they do. In the command prompt, you can type: slgmr.vbs /dli to find more information about the current license.
Thank you for reading :)